Gas line safety is critical for protecting your home and family. Faulty gas systems can lead to fires, explosions, or carbon monoxide poisoning, which causes over 400 deaths and 100,000 ER visits annually in the U.S. Regular maintenance and professional inspections can mitigate these risks and save you from costly repairs.
Here’s what you need to know:
- Warning Signs: Look out for the rotten egg smell, hissing sounds, dead vegetation, or unexplained spikes in your gas bill.
- Materials: Gas lines are made from black iron, CSST, polyethylene, or copper, each with specific strengths and weaknesses.
- Maintenance Tips: Inspect for corrosion, test shutoff valves, and schedule annual professional pressure tests (starting at $150).
- Emergency Steps: If you suspect a gas leak, evacuate immediately, avoid using electrical devices, and call your gas provider or 911.
- Professional Help: Licensed plumbers use advanced tools to detect leaks and ensure compliance with local codes.
Taking these steps ensures safety, reduces energy costs, and extends your gas system’s lifespan.
Everything to Know About Gas Lines in Plumbing
sbb-itb-5fe396b
Gas Line Basics

Gas Line Materials Comparison: Lifespan, Uses, and Safety Considerations
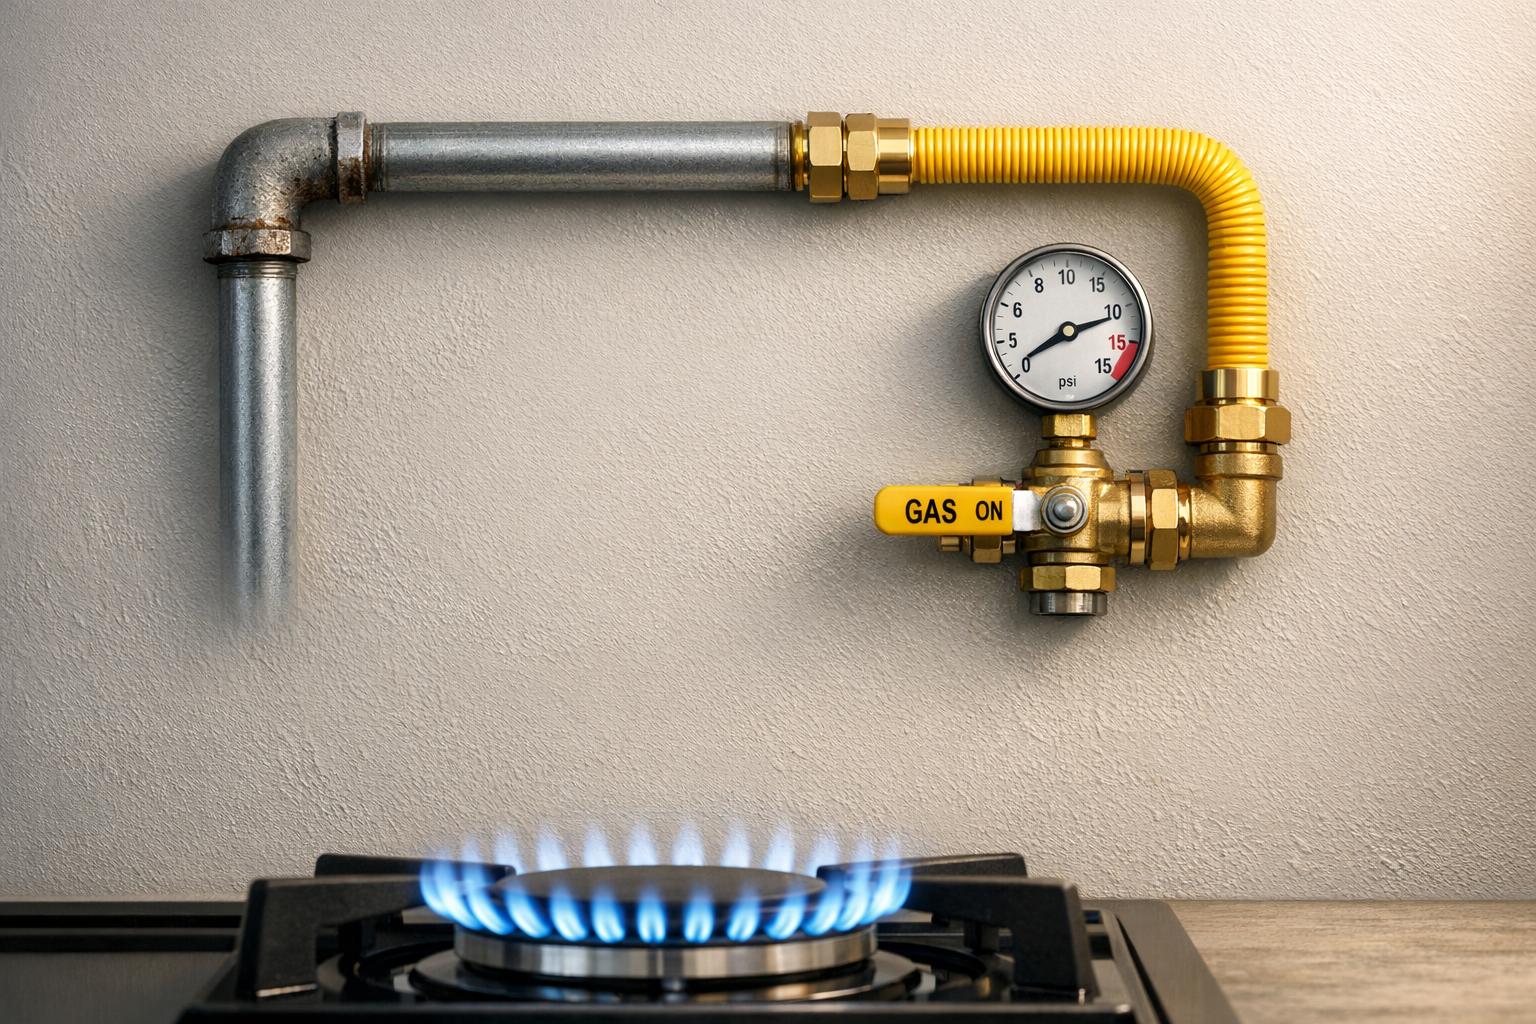
Understanding how your gas system works is crucial for maintaining safety. Natural gas flows from your utility company’s high-pressure distribution system into your home’s service line, where the pressure is reduced to safe residential levels. The gas meter serves as the dividing line between the utility’s responsibility and your own – everything beyond the meter is up to you to maintain.
Inside your home, a mainline typically runs through areas like the attic, distributing gas to smaller pipes. These branch lines deliver gas to individual appliances like your stove, water heater, or furnace. Vertical "drop lines" then guide the gas directly to each appliance using controlled pressure. Since natural gas is naturally odorless, utility companies add mercaptan, a chemical that gives it the familiar "rotten egg" smell, making leaks easier to detect.
How Gas Lines Work
Gas systems depend on controlled pressure to function safely. After passing through the meter, gas flows steadily through the mainline and branches off to reach different parts of your home. Each appliance gets the precise amount of gas it needs to operate efficiently.
Safety hinges on pressure regulation and the use of proper materials. Because gas naturally seeks to equalize pressure, any break or leak in the system allows gas to escape into the surrounding area. Monitoring your gas meter can help you catch potential issues early – if all your gas appliances are turned off but the meter dial keeps moving, it’s a strong indicator of a leak somewhere downstream.
Gas Line Materials
The materials used in gas lines play a big role in durability and safety. Here’s a breakdown of the most common options:
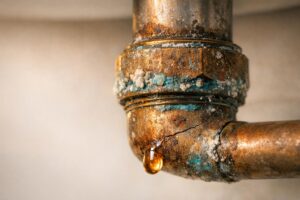
- Black Iron Pipe: This traditional choice for indoor gas lines is known for its strength and ability to handle high pressure. Properly maintained, these pipes can last 50 to 75 years. However, they’re prone to rust and corrosion, especially when exposed to moisture, which is a significant concern in areas like Texas with damp soil conditions.
- Corrugated Stainless Steel Tubing (CSST): Increasingly common in modern homes, CSST is a flexible and lightweight option that’s easy to install. Its yellow or black coating makes it easy to identify. While it reduces potential leak points by requiring fewer joints, it must be properly bonded and grounded to your home’s electrical system to prevent fire risks during lightning strikes. CSST typically lasts 30 to 50 years.
- Polyethylene (PE) Pipe: This durable plastic is the preferred material for underground gas lines. Resistant to corrosion and soil chemicals, PE pipes can last over 50 years if installed correctly. Its flexibility allows for fewer joints, but it’s susceptible to accidental damage during digging projects.
- Copper Piping: Once popular, copper is now rarely used due to modern code restrictions. While it resists corrosion, certain gas additives can cause it to flake, leading to clogs in the system. Copper pipes typically last 20 to 50 years.
| Material | Primary Use | Lifespan | Key Advantage | Main Concern |
|---|---|---|---|---|
| Black Iron | Indoor/Main lines | 50-75 years | Strong; fire-resistant | Prone to rust in moist soil |
| CSST | Indoor/Retrofits | 30-50 years | Flexible; fewer joints | Requires proper grounding |
| Polyethylene (PE) | Underground | 50+ years | Corrosion-proof | Vulnerable to digging damage |
| Copper | Limited Indoor | 20-50 years | Corrosion-resistant | Risk of flaking with gas additives |
Texas Gas Line Regulations and Licensing
Texas has strict regulations to ensure gas line safety. The Texas Railroad Commission oversees compliance for gas systems, while the Texas Real Estate Commission mandates that home inspectors report any issues with gas distribution systems. Plumbers working on gas lines must hold specific licenses, such as a Master License, to perform repairs and testing that meet code requirements.
State law also requires anyone planning to dig to call 811 at least 48 hours before starting. This free service marks underground gas lines to prevent accidental damage. With over 6,000 miles of underground pipelines serving more than 389,000 customers in Bexar County alone, this step is critical for safety. Licensed professionals use nitrogen or air – not live gas – when conducting pressure tests to check for leaks.
Signs of Gas Line Problems
Spotting gas line problems early can help you avoid serious risks. Your senses – smell, sight, and sound – are your first tools for identifying potential issues with your gas system.
The most recognizable sign is the distinct "rotten egg" smell. This odor comes from an additive called mercaptan, which makes gas leaks easier to detect. Hissing or whistling sounds near gas lines, meters, or appliances are another clear indicator of gas escaping under pressure.
Visual signs also play a role. Indoors, a yellow or orange flame on your gas stove instead of the usual blue points to improper combustion and could indicate a leak. Outdoors, dead patches of grass or wilted plants may appear because gas in the soil displaces oxygen, suffocating plant roots. Other visible signs include bubbles in standing water or dirt blowing near buried gas lines, which can signal escaping gas.
Physical symptoms in people and pets can also hint at gas exposure. Common symptoms include dizziness, fatigue, nausea, headaches, eye and throat irritation, nosebleeds, and chest pain. Pets may show signs such as disorientation, lethargy, vomiting, reduced appetite, or red, watery eyes. If these symptoms improve when you’re away from home, it could indicate a gas issue indoors.
Even your gas bill can provide clues. A sudden, unexplained spike in your bill despite normal usage might mean there’s a hidden leak. To check, turn off all gas appliances and observe your meter – if the dial keeps moving, a leak is likely. These early warning signs are critical and should prompt immediate action.
Warning Signs of Gas Leaks
Knowing the full range of leak indicators can help you act quickly. A simple and effective method is the soapy water test: mix dish soap with water and apply it to pipe joints. If you see bubbles forming, there’s likely a leak.
Pay attention to physical symptoms as well. Gas exposure often causes headaches, dizziness, and nausea, which tend to improve when you’re away from the affected area. Severe exposure can lead to chest pain, breathing problems, and extreme fatigue, with children and the elderly being especially vulnerable.
Your appliances can also give you clues. Look for soot buildup around connections, pilot lights that frequently go out, or appliances that aren’t heating properly – these can all suggest issues with gas flow.
| Warning Type | What to Look For | Why It Matters |
|---|---|---|
| Smell | Rotten egg or sulfur odor | Mercaptan additive makes gas leaks detectable |
| Sound | Hissing or whistling noise | Indicates gas escaping under pressure |
| Vegetation | Dead grass or wilted plants | Gas displaces oxygen in the soil |
| Flame Color | Yellow or orange instead of blue | Signals improper combustion |
| Utility Bill | Unexplained spike in gas costs | May suggest a hidden leak |
| Physical Symptoms | Headaches, dizziness, nausea | Signs of gas exposure |
These signs and tests are essential for identifying leaks and addressing them promptly.
Gas Leak Detection Tools
While your senses are a great starting point, detection tools provide precise confirmation and help locate hidden leaks. Homeowners can purchase plug-in or battery-operated methane detectors, which typically cost between $10 and $90.
Placement of these detectors is key. Since natural gas is lighter than air, detectors should be installed high on walls or near ceilings. For propane, which is heavier than air, place detectors near the floor. It’s important to note that carbon monoxide (CO) detectors, while crucial for identifying combustion byproducts, won’t detect raw natural gas leaks.
Professionals use advanced tools for more thorough checks. Electronic "sniffers" can detect even small gas concentrations, while ultrasonic detectors pick up high-frequency sounds that humans can’t hear. Pressure testing equipment is another option – technicians pressurize gas lines with air or nitrogen and monitor for pressure drops to pinpoint leaks.
"Natural gas is completely odorless, so, as a safety precaution, mercaptan, a sulfur-containing compound, is added so that a smell can be detected if there is a leak." – Krystal Remington, Product Support Technician, SupplyHouse.com
Professional inspections start at around $150, with repair services ranging from $150 to $1,400 depending on the extent of the problem. With U.S. fire departments responding to an average of 125,000 gas leak calls annually, investing in detection tools and regular inspections is a smart way to ensure safety and peace of mind.
Gas Line Safety Precautions
Everyone in your household should know where the gas shutoff valves are and understand when it’s time to call in a professional.
Finding and Using Shutoff Valves
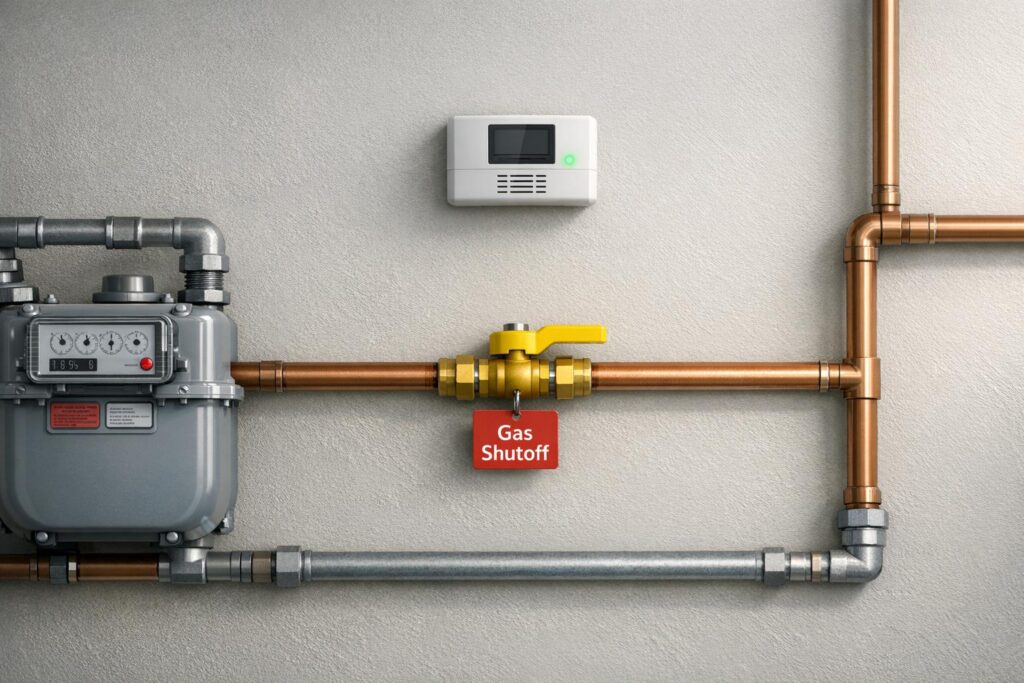
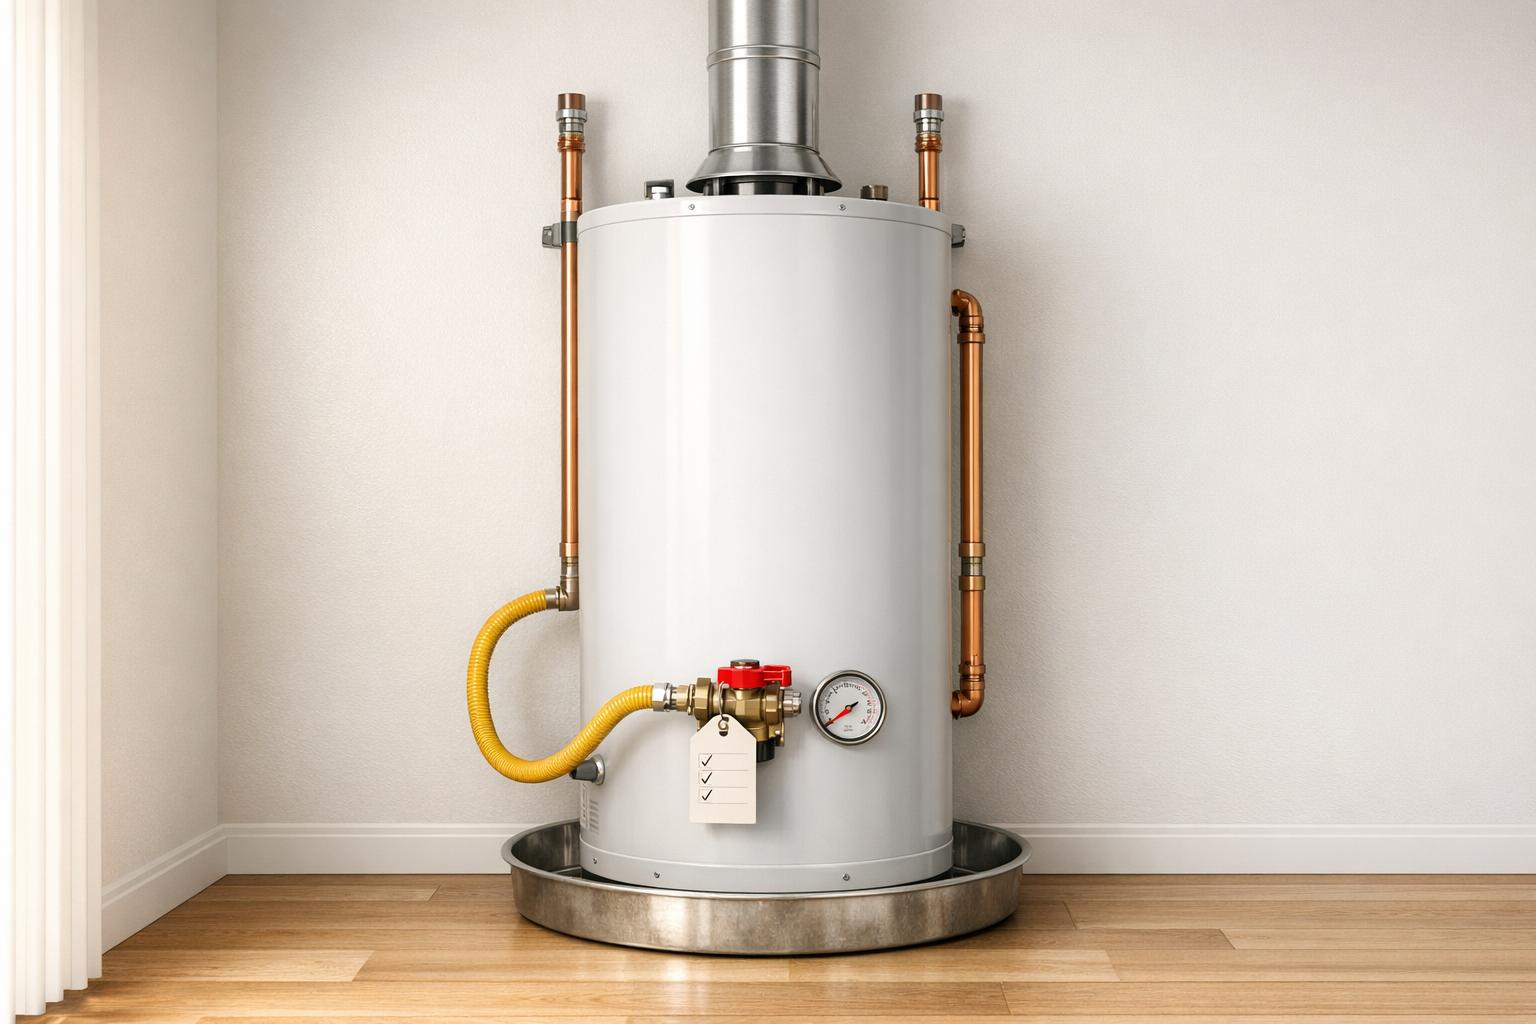
Your home is equipped with multiple gas shutoff valves, and knowing their locations can be life-saving in an emergency. The street-side valve is usually located just before your gas meter, often outside or in the basement. The house-side valve, on the other hand, is found where the main gas line enters your home, before it branches off to supply appliances. Additionally, each gas-powered appliance – like your stove, furnace, water heater, dryer, or fireplace – should have its own shutoff valve within six feet of the unit.
Operating these valves is simple: when the handle is parallel to the pipe, the gas is ON. To turn it OFF, rotate the handle 90° so it’s perpendicular to the pipe. The street-side valve may have a rectangular nub that requires a 12-inch adjustable wrench, while house-side valves typically have lever-style handles.
"Every few months, I give each shutoff valve a gentle turn just to make sure it’s not stuck. Valves that sit for years without being touched can seize up or corrode, and when you actually need to use them, they won’t budge." – Randal Fuller, Contractor and Owner, Fuller Services
Keep a 12-inch adjustable wrench near your gas meter for emergencies. Test the valves occasionally to ensure they’re functional, but remember: never attempt to turn the gas back on yourself after shutting it off. Only a licensed technician or gas company professional should restore service to confirm the system is leak-free and pilot lights are safely relit.
Once you’ve familiarized yourself with shutoff valves, it’s crucial to know how to react swiftly if there’s a gas leak.
What to Do During a Gas Leak
If you notice the distinct rotten egg smell of natural gas or hear a hissing sound, evacuate immediately without using any electrical devices. Get everyone out of the building, including pets.
While exiting, open windows and doors if it’s safe to do so, and, if accessible, turn off the main gas valve. Once outside and at a safe distance, contact 911, your local fire department, or your gas utility provider. It’s worth noting that over 189 million Americans rely on natural gas in their homes, and approximately 630,000 natural gas leaks are reported annually in the United States. Stay alert for symptoms like headaches, dizziness, nausea, or fatigue, as these can indicate gas exposure. Carbon monoxide from malfunctioning appliances causes more than 400 accidental deaths and over 100,000 emergency room visits each year.
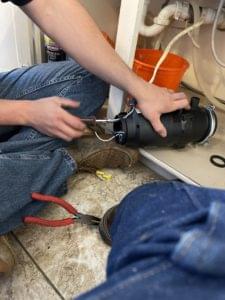
Why You Shouldn’t Repair Gas Lines Yourself
After safely shutting off the gas and evacuating, leave repairs to licensed professionals.
Handling gas lines requires expertise. Natural gas is highly flammable, and even a small spark – whether from a light switch, phone, or static electricity – can trigger an explosion. Incorrect repairs can also lead to incomplete combustion, releasing carbon monoxide, which is both colorless and odorless.
DIY repairs often cause more harm than good. Without specialized tools like electronic detectors, ultrasonic devices, or pressure gauges, it’s nearly impossible to pinpoint hidden leaks or ensure repairs are secure. Over-tightened or improperly sealed fittings can create new leaks. Furthermore, modern Corrugated Stainless Steel Tubing (CSST) systems must be grounded correctly to prevent damage from lightning strikes – a detail most homeowners overlook.
Attempting unlicensed repairs can also lead to legal and financial consequences. For example, in Texas, homeowners are responsible for maintaining all gas equipment downstream of the meter, including house piping and appliance connectors. Improper fixes may void your insurance and leave you liable for damages. Always rely on trained professionals to ensure safety and compliance.
Gas Line Maintenance Practices
Keeping your gas lines in good shape is essential for avoiding problems and extending their lifespan. While homeowners can handle some basic checks, others require the expertise of a licensed professional.
Checking for Corrosion and Damage
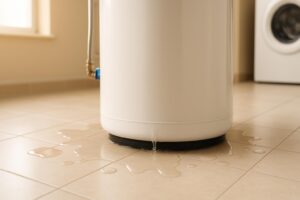
Start by inspecting any exposed gas pipes. Use a flashlight to look for rust, cracks, dents, or loose fittings. Steel and iron pipes are especially at risk in areas with moisture, shifting soil, or extreme temperature changes. Pay close attention to valve stems, unions, and appliance connectors – stains, looseness, or debris in these areas often point to problems.
For buried lines, watch for signs like dead vegetation patches or bubbling in standing water along the pipe’s path. These could indicate underground leaks caused by tree roots or corrosion. You can also apply soapy water to fittings; bubbles forming will confirm a leak.
"A professional should always do gas hookups because of the serious dangers and risks involved. Signs you might need gas plumbing repairs are rust, damaged connections, or a gas smell."
- Peter deBaptiste, President, Joe Cole Plumbing
Another easy check is to ensure the gas meter doesn’t move when all appliances are off. Although gas pipelines can last up to 50 years, experts recommend considering replacement after 20 to 30 years. These basic checks help identify potential issues before calling in a professional for more in-depth testing.
Pressure Testing and Leak Prevention
After a visual inspection, professional pressure testing is the next step to ensure your system is leak-free. This process is the gold standard for detecting leaks that aren’t visible. A licensed technician will isolate your gas lines, seal all outlets, and pressurize the system using air or nitrogen – never live gas. A precision gauge is then used to monitor for pressure drops, which can reveal weak spots. This is a crucial safety measure, as nearly one-third of residential gas leaks result in fires or explosions.
Experts recommend scheduling this inspection annually, with costs typically starting at $150. During the visit, the technician will also check appliance connections, ensure ventilation systems are clear, and monitor underground lines for potential issues like tree root interference.
Setting Up a Maintenance Schedule
To keep your gas system in top condition, combine monthly homeowner checks with annual professional inspections. Homeowners should perform visual inspections for rust, corrosion, or the "rotten egg" smell of mercaptan – a chemical added to natural gas to make leaks easier to detect. Test your carbon monoxide and natural gas detectors every six months, and always keep the area around your gas meter clear of debris.
| Maintenance Task | Frequency | Responsible Party |
|---|---|---|
| Visual inspection for rust/corrosion | Monthly | Homeowner |
| Check for "rotten egg" odor or hissing | Continuous | Homeowner |
| Professional gas line pressure test | Annually | Licensed Plumber |
| Appliance connection & vent inspection | Annually | Licensed Plumber |
| Gas/CO detector battery testing | Every 6 months | Homeowner |
| Replacement of aging flex connectors | Every 15 years | Licensed Plumber |
In Texas, homeowners are responsible for maintaining all gas equipment downstream of the meter, including house piping and appliance connectors. Regular maintenance not only reduces the risk of leaks and carbon monoxide exposure – which causes over 400 deaths and 100,000 ER visits annually – but also extends the life of your gas system. Professional repairs can range from $150 to $1,400, depending on the issue. Staying on top of maintenance is far more affordable than dealing with emergency repairs or the damage caused by neglect.
When to Call a Professional
Sometimes, even with the best detection and maintenance efforts, you’ll need professional help. If you notice a rotten egg smell, hear hissing sounds, or spot dead vegetation near your gas line, it’s time to act. Evacuate immediately and call a professional. Additionally, if anyone in the household experiences unexplained physical symptoms, it could indicate low-level gas exposure or even carbon monoxide poisoning. These warning signs are critical and shouldn’t be ignored.
Other red flags include malfunctioning appliances or sudden, unexplained increases in your gas bill. These could be signs of a gas leak, which is not only costly but also dangerous. In the U.S., carbon monoxide exposure from gas appliances is responsible for over 400 accidental deaths and more than 100,000 emergency room visits annually.
Round Rock Plumbing‘s Gas Line Services
Round Rock Plumbing offers a range of services to keep your gas lines safe, including leak detection, repairs, safety inspections, pressure testing, and 24/7 emergency support. Operating under Master Plumber License #38353, they have earned a stellar 4.9-star rating and provide services across Williamson County, including Round Rock and nearby areas.
"Safety is paramount, especially when it comes to GAS LINE REPAIR. Our certified professionals ensure that your gas lines are in optimal condition, safeguarding your premises from potential hazards."
- Round Rock Plumbing
Professional Diagnostic Tools
Licensed plumbers bring advanced technology to the table, using tools like electronic sniffers, ultrasonic detectors, and video camera systems. These tools are particularly effective during controlled pressure tests, which use nitrogen or air – never live gas – to locate even the smallest leaks . Unlike basic methods like the soapy water test, these tools can uncover hidden issues that might otherwise go unnoticed.
Why Choose Licensed and Insured Professionals?
Hiring a licensed professional isn’t just about peace of mind – it’s about safety and compliance. Licensed plumbers follow strict local codes and carry liability insurance, ensuring repairs are done right the first time. This approach not only prevents recurring leaks but also helps your appliances run efficiently. Attempting DIY repairs can void your insurance and lead to bigger problems down the line .
"Gas plumbing is extremely hazardous and should only be serviced by a licensed plumber who is well versed in its risks."
While professional inspections typically start at around $150, they’re a smart investment. Gas pipelines can last up to 50 years, but experts recommend scheduling inspections once they hit the 20- to 30-year mark. Spending a little now can save you from costly emergency repairs – or worse – catastrophic failures.
Conclusion
Overlooking gas line safety isn’t just careless – it’s dangerous. Regular maintenance and professional inspections can help avoid catastrophic outcomes.
Be alert to warning signs like a rotten-egg smell, hissing sounds, or patches of dead vegetation near gas lines. These red flags require immediate attention. In addition to staying vigilant, adopt a routine maintenance schedule. Perform quarterly visual checks for rust or corrosion on exposed pipes. For systems older than 20 years, plan for semi-annual inspections, while annual inspections are generally sufficient for newer systems. These steps minimize the temptation – and risks – of attempting unsafe DIY repairs.
"Gas leaks are silent threats. You can’t always see or smell them, but they can compromise your family’s health, safety, and even your home’s structural integrity."
DIY fixes might seem tempting but aren’t worth the gamble. Detecting gas leaks safely requires specialized tools and expertise, making this a job for licensed professionals. Attempting unlicensed repairs not only jeopardizes safety but could also void your insurance and breach local building codes. Hiring a professional for an inspection, which typically starts at around $150, is a small price to pay compared to the costs of emergency repairs or system failures.
With proper care, a gas system can last up to 50 years. Familiarize yourself with the location of your main shut-off valve, install carbon monoxide detectors near bedrooms, and contact a licensed professional at the first sign of trouble. Preventative maintenance and timely expert intervention are key to ensuring your gas system remains safe and reliable for years to come. Follow these steps to protect your home and loved ones.
FAQs
What steps should I take if I smell gas in my home?
If you notice the smell of gas in your home, it’s crucial to act quickly to ensure everyone’s safety. Leave your house immediately, and avoid any actions that could create sparks or flames. This includes turning on lights, using electronic devices, or lighting matches.
Once you’re in a safe location, call 911 and your gas provider to report the situation. Do not go back into your home until professionals have inspected the area and confirmed it is safe. Your safety comes first – never ignore the smell of gas or attempt to locate the source on your own.
How often should I schedule a professional gas line inspection?
To keep your home safe and avoid potential risks, it’s a good idea to schedule a professional gas line inspection once a year. If your home is older or you use several gas-powered appliances, you might want to increase this to every six months. These regular check-ups can spot leaks, corrosion, or other issues early, helping to address them before they turn into bigger problems.
What are the main differences between CSST and polyethylene gas lines?
The main differences between CSST (Corrugated Stainless Steel Tubing) and polyethylene gas lines come down to their materials, applications, and how they are installed. CSST is made from flexible stainless steel, making it lightweight and simple to work with. It’s often chosen for indoor use because it’s easier to install and can save on labor costs. That said, proper grounding is essential to reduce safety risks, such as damage from lightning strikes.
On the other hand, polyethylene gas lines are made from a tough plastic material designed for outdoor, underground use. This material resists weathering and corrosion, making it a reliable choice for buried gas lines. However, installing polyethylene pipes requires professional expertise to comply with local safety regulations and ensure correct placement underground.
To sum it up, CSST works well indoors, while polyethylene is the go-to option for underground outdoor gas lines, thanks to its strength and resistance to environmental factors.
Related Blog Posts
- Emergency Plumbing Checklist for Homeowners
- How to Detect Hidden Water Leaks in Your Home
- Round Rock Gas Leak Risks and Solutions
- Replacing Pipes in Older Homes: Common Challenges
Need a Plumber in Round Rock?
Get fast, reliable service from licensed professionals.
Or call us now: (512) 598-4241